

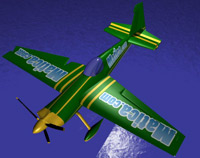
Alex had been itching to publish his dog fighting game that we have been developing on and off for the past few years now, but Clare was not too enthusiastic as she strongly wanted to keep to our catalogue of non violent games.
While watching the Red Bull Air Race and Aero GP we were taken by the distinctive looking and very nimble planes. This inspired us to explore the possibility of developing a non violent aeroplane game. Flying around some kind of course against the clock.
Aero GP had Barnstorming and Dogfighting, and no one got hurt. So perhaps there could be a dogfighting aspect and it could still be considered a non violent game?
We didn't know what obstacles we would use, or even if the game would be viewed from above or from the side at this stage. Perhaps we would produce more than one game. Our starting point would be to design the plane (just like we started Matica Karts by designing the car), and take it from there.
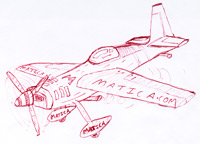
Our usual process would be to model using clay, but this time we were aiming for a 3D computer model.
The only 3D software we knew how to use was 3D Studio Max which costs almost £4,000 per license. £8,000 for both of us to have a copy, so we decided to use Blender which is a free open source 3D content creation suite.
We would be learning how to use a brand new piece of 3D software, which we were excited to do. We plan to produce some animated movies to entertain our young children, so this would be an ideal opportunity to see if Blender would be up to the task.
We gathered as many pictures as possible of acrobatic aeroplanes, as reference images. They were all similar, we liked the look of the 'eyes' on the front of the Zivko Edge 540 which heavily influenced our sketches.
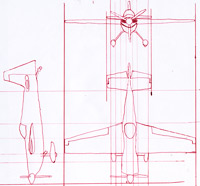
We needed 3 more accurate sketches of the plane viewed from above, from the front, and from the side. The wingspan, fuselage length, and every other part of the aircraft had to be the exact same length in each picture so out came the ruler.
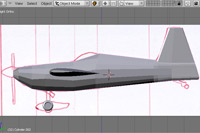
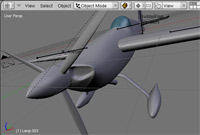
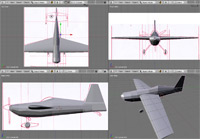
These drawings were scanned in and loaded into the Blender 3D package to act as a guide for us to model the aeroplane.
We were very impressed with Blender, and found it every bit as good as the best commercial 3D software.
After a very long weekend we had our basic model, and were ready to apply a texture to it. We decided to base the paint job on the same livery as our favourite Matica Karts car.
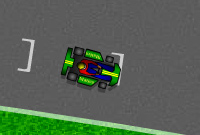
To do this we had to flatten the 3D mesh (like the globe is flattened to show a flat atlas of the earth), and then paint the livery onto this flattened mesh.
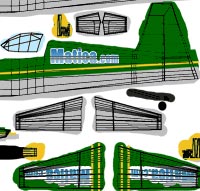
Blender had very good tools for flattening the 3D mesh, although it took a while for us to figure out how to get it working.
Next we needed to set up our scene in Blender. A camera, a couple of lights, and our aeroplane. We were now going to see our finished aircraft for the first time.

We were really impressed with the results, and very happy that we decided to give this Blender software a try. We will definitely be using Blender for all of our 3D work from now on.
We had a little tidying up left to do with the model, and with the livery. We also used Blender's tools to get the propeller and the flaps on the tail and wings working.
The next stage was to do a little animating of the 3D aeroplane, which we will detail in the next part.