
Our games were limited to a maximum width of 640 pixels at the time this game was in development. The reason for this limit is to enable us to support a wide range of visitors to Matica.com.
Most visitors (over 99 percent) would be able to fit a 640 pixel width game on their screen. Over 94 percent of visitors would be able to fit both our web page, and a 640 pixel width game on their screen.
Matica Air Race used our full 640 pixel maximum, and there still wasn't room for the larger plane to fit comfortably into the game. You would not see enough of the obstacles to have time to manoeuvre the aircraft. The new smaller plane would allow more scope for the given area.
Our next demo shows the old and new planes flying together.
We could have just scaled down the original aeroplane, but as you can see from the 3rd image at the bottom of the demo there is a loss of volume.
The next stage was to design some scenery. When Clare and I first met we lived right on the river Thames in London. The closest landmark was Tower Bridge, so we thought we would set the scene from the Millennium Dome to Tower Bridge. We didn't know it at the time, but this was going to delay the game by well over a year.
We knocked up a 3D model of the Millennium Dome in Blender very quickly (hours). Tower Bridge took much longer (over a week). We spent many evenings working on the 3D model and it used up a lot of our enthusiasm and energy. So much so that we didn't come back to the project for over a year.
One weekend we bit the bullet and started development again. We finished the 3D model of Tower Bridge in blender and by the end of the weekend we had managed to get the plane flying around a little strip of river.
We flipped a coin to decide if we should make the first game from a side on view or viewed from above. As you can see in the video the side on view won.
We fleshed out the in game scenes and objects to add more variety and to get our enthusiasm back for the game. Most of the scenery was vector drawn in Flash by hand using reference images Alex took with his digital camera during his weekly bike rides.
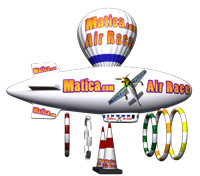
The blimp, hot air balloon, and rings etc. were very quickly modeled in 3D using Blender. For our purposes Blender was still proving to be every bit as effective as 3D Studio Max. It even worked on our Ubuntu machine as well as our Windows machines.
So the 3D object could have been created using 100% free software, although we used Photoshop for the textures instead of Gimp
Soon the game was looking pretty good, and was fun to play too. We were happy with most of the game to this point and could move onto level design. It was the level design where we decided to do things a little different, more about that in the next part.
© 2011-2026 Over The Air To You Ltd., All rights reserved. Web Design Agency23